Looking for a fun project to get into? Look no further than making your own paper clay! Not only is it a great material to work with for Christmas crafts, but you won’t believe what this clay is made from… Toilet paper!
If you’re interested in making your own clay, be sure to check out our other articles and recipes like DIY Porcelain clay and our list of clay articles and tutorials.
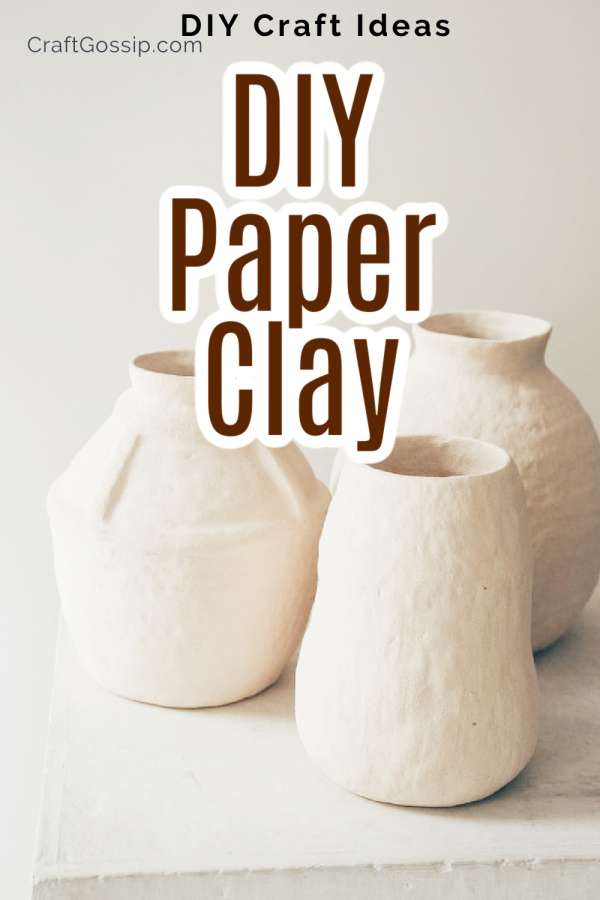
Holly from Borei Design shared her own recipe for air-dry paper clay that is perfect for all sorts of projects. She was inspired to create her own clay after realizing that it would be perfect for her paper mache projects.
The best part about Holly’s paper clay recipe is that it’s super easy and inexpensive to make. All you need is cheap toilet paper and a few other supplies. With just a little bit of time and effort, you’ll have your very own air-dry paper clay that you can use for a variety of sculpting projects.
Not only is this a great way to save money on expensive clay, but it’s also an eco-friendly option since you’re repurposing an item that would otherwise go to waste. So why not give it a try and see what fun and unique projects you can create with your own homemade paper clay?
You may be interested in some of our other articles and recipes for making your own clay such as these recipes
DIY Porcelain clay and this list of clay articles and tutorials.
Holly from Borei Design used cheap toilet paper combined with a few other supplies to make her own air-dry clay.
Get the full recipe and tutorial here at: Borei Design- DIY Air Dry Paper Clay
Having worked with paper clay myself, I’ve picked up a few tips and tricks that I’d like to share with you to make your crafting experience with this material as enjoyable as possible.
Tip 1: Keep the Clay Moist
Paper clay is air-dry clay, meaning it dries when exposed to air. To prevent it from drying out too quickly, it’s important to keep the clay moist. I like to store my paper clay in an airtight container or a plastic bag with a damp cloth or paper towel. This helps to keep the clay pliable and workable, even during longer crafting sessions.
Tip 2: Use a Protective Surface
When working with paper clay, it’s essential to use a protective surface to prevent it from sticking. I usually lay down a piece of parchment paper or a plastic mat before I start working with the clay. This not only protects my work surface, but it also makes it easier to peel the clay off once I’m done.
Tip 3: Experiment with Texture
One of the great things about paper clay is that it’s easy to manipulate, and you can experiment with different textures. You can add texture to your clay using a variety of tools, including toothpicks, forks, and combs. You can also create texture by imprinting objects such as lace or leaves onto the clay. Don’t be afraid to play around and try new things.
Tip 4: Smooth Out Imperfections
As with any clay, paper clay can be prone to imperfections and bumps. But don’t worry, you can easily smooth out these imperfections with some water and a small brush. Simply wet the brush, smooth out any bumps or ridges, and let the clay dry.
Tip 5: Be Patient
When working with paper clay, it’s important to be patient. The clay can take some time to dry completely, especially if you’re working on a larger project. It’s best to let the clay dry overnight or even longer if necessary. Rushing the drying process can result in cracks or other imperfections.
Homemade Recycled Newspaper Paper Clay Recipe
Creating paper clay from recycled newspaper is not only a fantastic way to repurpose materials but also a versatile crafting medium that can be used for various artistic projects. This recipe will guide you through the process of making your own paper clay from old newspapers.
Ingredients:
- Recycled newspaper (approximately 1-2 cups shredded)
- Water
- White glue or liquid starch
- Cornstarch
- Large bowl
- Pot
- Wooden spoon
- Fine mesh strainer or cheesecloth (optional)
- Plastic wrap or airtight container (for storage)
Instructions:
- Prepare the Newspaper:
- Collect a good amount of old newspapers. Tear the newspapers into small pieces, removing any glossy or colored pages. The more finely you tear the paper, the smoother your paper clay will be.
- Soak the Paper:
- Place the torn newspaper pieces into a large bowl and cover them with water. Let the paper soak for at least 24 hours. This will soften the paper fibers and make them easier to work with.
- Drain and Blend:
- After soaking, drain the water from the bowl. If desired, you can blend the soaked paper using a blender or food processor in batches until you achieve a smooth, pulpy consistency. This step is optional, but it can result in a smoother paper clay.
- Cook the Pulp:
- In a pot, mix the paper pulp with water. Use approximately equal parts of paper pulp and water. Heat the mixture over medium heat, stirring constantly with a wooden spoon. The goal is to break down the paper fibers and create a thick, mushy consistency.
- Strain (Optional):
- If you blended the paper earlier, you might skip this step. If not, consider straining the mixture through a fine mesh strainer or cheesecloth to remove any large pieces of paper.
- Add Binding Agents:
- Once the paper pulp is thoroughly cooked and mushy, remove it from the heat. Add in white glue or liquid starch as a binding agent. Start with a small amount and gradually add more until the mixture reaches a clay-like consistency. A general ratio is about 1 part glue to 2 parts paper pulp.
- Add Cornstarch:
- Gradually add cornstarch to the mixture while stirring. This will help thicken the clay and give it a smoother texture. Keep adding cornstarch until the clay is no longer sticky and is easy to handle.
- Knead the Clay:
- Transfer the mixture to a clean surface and knead it like you would with regular clay. Add more cornstarch as needed to achieve the desired texture.
- Store the Paper Clay:
- If you’re not using the paper clay immediately, wrap it in plastic wrap or store it in an airtight container to prevent it from drying out.
Congratulations! You’ve successfully made your own paper clay from recycled newspaper. This versatile material can be used for sculpting, modeling, crafting, and a wide range of artistic projects. Enjoy the creative possibilities that your homemade paper clay offers!


Link to recipe no longer valid.